Hotline
+86-136 8495 9862
Email:cennia@szmizhi.com
Add::104,Building 27,Third Industrial Zone, Longxi Community,Longgang District,Shenzhen,China.
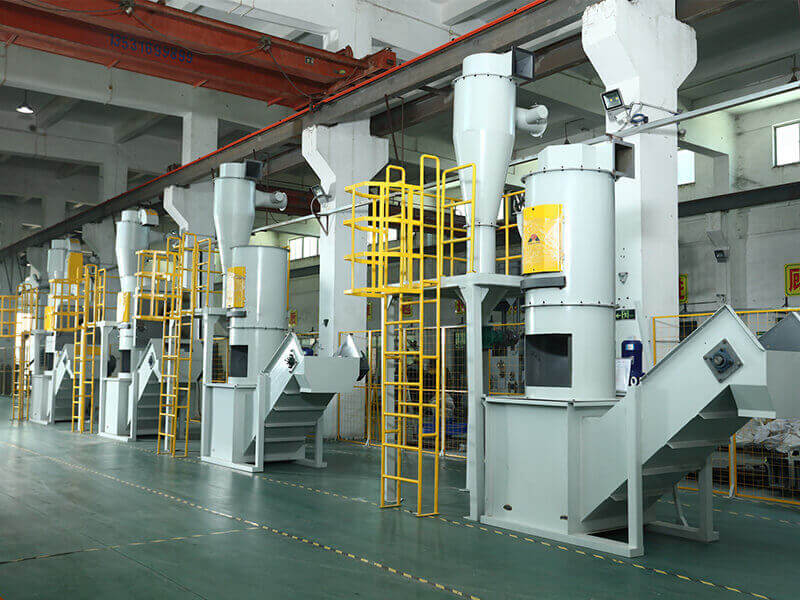
Coil Forming & Handling Equipment
Surface Treatment Equipment
Solutions
Application
About Us

Welcome to MIZHI
For consultation/feedback, please call the service hotline: +86-136 8495 9862 Email:cennia@szmizhi.com

Coil Forming & Coil Handling Solutions
Surface Treatment Solutions


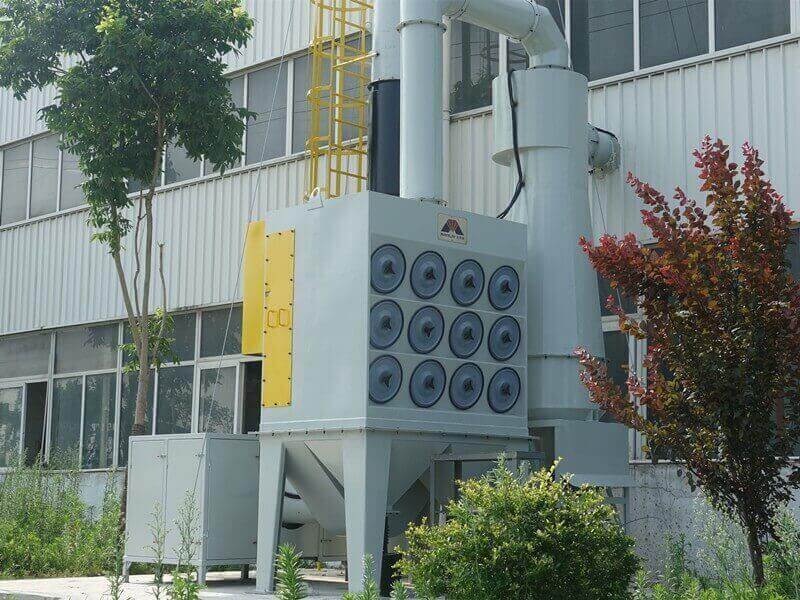
The filter is the heart of any dust collector, responsible for trapping particulate matter and maintaining clean air in industrial environments. Over time, even the highest-quality filters become clogged, damaged, or worn, compromising system performance, increasing energy costs, and risking regulatory non-compliance. Proper filter replacement is therefore a critical maintenance task that requires careful planning, adherence to safety protocols, and attention to detail. This comprehensive guide outlines the step-by-step process for replacing dust collector filters, covering preparation, removal, installation, post-replacement checks, and best practices for different filter types. Whether dealing with bag filters, cartridges, or panels, following these guidelines ensures that replacements are done safely, efficiently, and effectively, restoring the dust collector to optimal working condition.
Before beginning the filter replacement process, thorough preparation is essential to minimize downtime, prevent accidents, and ensure a smooth procedure. Start by reviewing the dust collector’s operation manual to understand manufacturer-specific requirements, such as filter type, size, torque specifications for fasteners, and recommended tools. Note any special instructions for the specific model—for example, some cartridge collectors require a specific sequence for removing filter covers, while baghouses may have unique access panel configurations. Failing to follow these guidelines can damage components or reduce filter performance.
Next, gather all necessary tools and materials. Common tools include screwdrivers, socket wrenches, filter pullers (for cartridges), gloves, and a flashlight for inspecting hard-to-reach areas. Have replacement filters on hand, ensuring they are the correct type and size for the system. For example, a baghouse designed for 16-inch diameter bags cannot use 12-inch bags, as improper fit will allow unfiltered air to bypass the filter. Verify that the new filters are compatible with the dust type—filters for abrasive materials (e.g., sand) require thicker media than those for fine powders (e.g., flour). Additionally, prepare safety equipment: respiratory protection (N95 or higher masks, or supplied-air respirators for hazardous dusts), safety glasses, hearing protection, and coveralls to prevent dust exposure.
Safety preparation is paramount, especially when dealing with hazardous or combustible dusts. Implement lockout/tagout (LOTO) procedures to shut down the dust collector, disconnect power to fans, motors, and cleaning systems, and secure the equipment with locks and tags to prevent accidental startup. This step is non-negotiable—failure to lock out the system can lead to serious injury or death if a fan restarts during filter replacement. For systems handling combustible dusts (e.g., aluminum, wood, or chemical powders), take additional precautions: ensure the area is well-ventilated, use non-sparking tools to prevent ignition, and have a fire extinguisher nearby. Test for explosive dust concentrations using a dust monitor if available, and avoid creating dust clouds during removal.
Finally, prepare the work area. Lay down plastic sheeting or drop cloths to catch falling dust, making cleanup easier and reducing contamination. Set up a designated area for used filters, preferably sealed in bags or containers to prevent dust release. If the dust is toxic or hazardous (e.g., lead, asbestos, or silica), prepare disposal containers that meet regulatory requirements—some jurisdictions mandate specific labeling or approved containers for hazardous waste. Communicate the replacement schedule to other workers to minimize foot traffic in the area, and post warning signs to alert others that maintenance is in progress.
With preparations complete, the next step is removing the old filters. The exact process varies by filter type, but the core principles—minimizing dust release, inspecting for damage, and documenting conditions—apply universally.
For bag filters in baghouses:
Open the access door to the clean air plenum (the side where filtered air exits) using the appropriate tools. Avoid forcing stuck doors, which may indicate pressure buildup—double-check that the system is depressurized before proceeding.
Visually inspect each bag for obvious signs of damage, such as tears, holes, or fraying at the top or bottom. Note any bags with excessive dust caking, which suggests a malfunctioning cleaning system (e.g., a failed pulse valve in a pulse-jet baghouse).
To remove a bag, disconnect it from the tube sheet or header. For top-loaded bags, twist or unlock the retaining collar; for bottom-loaded bags, release the clamp or clip at the bottom. Grasp the bag firmly to prevent it from falling and stirring up dust.
Slide the bag off the supporting cage (if used), taking care not to shake it excessively. If the cage is reusable, inspect it for corrosion, bending, or cracks—damaged cages can puncture new bags and should be replaced.
Place the used bag in a sealed container immediately to prevent dust from escaping. If multiple bags are being replaced, repeat the process, keeping track of which bags were removed to identify patterns (e.g., consistent damage in one section of the baghouse may indicate airflow issues).
For cartridge filters in cartridge collectors:
Remove the access panel or lid covering the cartridge bank, using a wrench to loosen bolts or clips. Some collectors have hinged panels that swing open, while others require full removal of the lid.
Inspect cartridges for pleat damage, such as tears, crushed pleats, or gaps between pleats. Check for signs of moisture, which can cause dust cakes to harden or promote mold growth, and note any uneven dust buildup, which may signal blocked airflow.
Use a filter puller or grasp the cartridge’s top handle (if equipped) to twist and pull it free from the mounting plate. Avoid pulling on the pleats, as this can tear the media. For cartridges with bottom seals, ensure the seal is fully disengaged before removal.
If the cartridge has a pre-filter sleeve, remove and dispose of it separately if it is not reusable. Inspect the mounting plate for dust buildup or debris, which can prevent proper seating of the new cartridge.
Place used cartridges in sealed bags, taking care to contain any loose dust. For large cartridges, have a helper assist with lifting to avoid strain or dropping the filter.
Locate the filter housing, typically accessed via a slide-in frame or latched door. Release the latches or remove screws to open the housing.
Slide out the panel filter, noting its orientation (some panels are directional, marked with “air flow” arrows). Inspect for holes, tears, or excessive dust loading—panel filters often have a visual indicator strip that changes color when replacement is needed.
Dispose of the panel filter in a sealed container, as they are rarely reusable. Check the filter frame for dust buildup and vacuum or wipe it clean before installing the new filter.
Throughout the removal process, document the condition of the old filters with photos or notes. This documentation helps identify underlying issues: for example, repeated tearing at the bottom of bag filters may indicate excessive vibration, while oil contamination on cartridges could signal a leaking compressor in a pulse-jet system. Share these findings with maintenance supervisors to address root causes and prevent premature filter failure.
Installing New Filters: Ensuring Proper Fit and Function
Installing new filters correctly is critical to maximizing their lifespan and ensuring efficient dust collection. Rushing this step or cutting corners can lead to air bypass, reduced filtration efficiency, and costly rework. Follow these steps for each filter type:
For bag filters:
If using reusable cages, ensure they are clean and undamaged. Slide the new bag over the cage, making sure the bag is fully extended and not twisted—twists can create gaps where dust can bypass.
Align the bag’s top opening with the tube sheet or header. For top-loaded bags, secure the retaining collar by twisting until it locks into place; for bottom-loaded bags, attach the bottom clamp or clip to the bag’s base, ensuring a tight seal against the cage.
Verify that the bag hangs straight and does not touch adjacent bags or the collector walls. Contact between bags can cause abrasion and premature failure, especially in high-vibration environments.
For pulse-jet baghouses, ensure the bag’s top is positioned correctly under the pulse nozzle—misalignment can reduce cleaning effectiveness, leading to faster clogging.
For cartridge filters:
Check the new cartridge for damage (e.g., crushed pleats or torn media) before installation—defects can occur during shipping. Verify that the cartridge’s seal material (e.g., rubber, foam) is compatible with the dust type and temperature.
Align the cartridge with the mounting plate, ensuring any O-rings or gaskets are properly seated. For threaded cartridges, twist clockwise until hand-tight; avoid over-tightening, which can damage the seal or strip threads.
Push the cartridge firmly into place until the top and bottom seals make full contact with the mounting surfaces. A gap as small as 1/16 inch can allow significant dust bypass, reducing efficiency by 20% or more.
For cartridges with pre-filter sleeves, install the sleeve according to the manufacturer’s instructions, ensuring it covers the pleats completely without restricting airflow.
For panel filters:
Check the new panel for directional arrows and align it with the airflow direction in the housing. Installing the filter backward reduces efficiency, as the media is designed to capture dust on the upstream side.
Slide the panel into the frame, ensuring it fits snugly without gaps. Some panels have tabs or slots that must engage with the frame to prevent movement.
Close the housing door or secure the frame, tightening latches or screws evenly to avoid warping the frame, which can create gaps.
After installing all new filters, inspect the installation for common issues: loose fasteners, misaligned seals, or filters that are not fully seated. For systems with multiple filters, double-check that each one is installed correctly—even a single poorly installed filter can compromise the entire system. Reinstall access panels or doors, tightening bolts in a star pattern to ensure even pressure and a proper seal. Avoid over-tightening, which can warp panels or strip threads, creating leaks.
Once new filters are installed, post-replacement checks are essential to confirm that the dust collector is operating correctly. Skipping these steps can miss issues that only become apparent during operation, leading to extended downtime later.
Start by reversing lockout/tagout procedures to restore power to the system. Before restarting, ensure all tools, debris, and disposal containers are removed from the work area, and close all access doors securely. Restart the dust collector in a controlled manner: first, power on the control panel, then activate the fan at low speed to pressurize the system gradually, which reduces stress on new filters.
Monitor pressure differentials across the filter media using the system’s manometer or digital sensor. Record the initial pressure drop, which should be significantly lower than before replacement—typically 0.5 to 2 inches of water column (inH₂O) for new filters, depending on the type. A pressure drop that is too low (near zero) may indicate a poor seal or incorrectly installed filter, allowing unfiltered air to bypass. A pressure drop that is higher than expected could signal a blocked inlet duct or a filter installed backward.
Test the cleaning system to ensure it functions with the new filters. For pulse-jet systems, activate a manual cleaning cycle and listen for the distinct “pop” of pulse valves firing—each valve should operate with consistent sound and timing. Visually inspect the pulse nozzles to ensure they are aligned with the filter tops, and check for air leaks around valves or fittings. For reverse-air systems, verify that damper valves open and close properly, creating sufficient reverse airflow to dislodge dust. For mechanical shakers, test the shaking mechanism to ensure it generates enough vibration without excessive noise, which may indicate misalignment.
Run the dust collector under normal operating conditions for at least 30 minutes, then recheck pressure drop. It should stabilize within the manufacturer’s recommended range—typically 2 to 6 inH₂O for most industrial applications. Monitor for signs of dust leakage, such as visible dust around access doors, fan outlets, or duct connections. Use a smoke pencil or fogger to detect leaks: release smoke near potential leak points, and watch for movement toward the collector, indicating air ingress, or away from the collector, indicating air egress (unfiltered dust release).
Finally, document the replacement in the maintenance log, noting the date, number and type of filters replaced, initial pressure drop, and any issues encountered during removal or installation. Compare this data with previous replacements to track trends—for example, if filter life is decreasing, it may indicate a problem with the cleaning system or an increase in dust loading from production processes.
Extending Filter Life: Best Practices for Post-Replacement Care
Proper post-replacement care can significantly extend the life of new filters, reducing replacement frequency and costs. Implement these practices to maximize filter performance:
Optimize cleaning cycles: Adjust the cleaning system’s frequency and intensity based on pressure drop. Most modern dust collectors use differential pressure controllers to trigger cleaning cycles automatically—ensure the setpoints are calibrated to the new filters’ specifications. Avoid over-cleaning, which can wear filter media prematurely, or under-cleaning, which allows dust cakes to harden. For example, in pulse-jet systems, increasing pulse frequency during high-production periods (when dust loading is higher) can prevent excessive cake buildup.
Monitor inlet conditions: Dust collector filters are sensitive to moisture, temperature, and chemical exposure. Install sensors to monitor inlet air temperature and humidity—excessive moisture can cause dust to cake, while temperatures exceeding the filter’s rating can degrade media (e.g., polyester filters may melt at temperatures above 275°F / 135°C). For corrosive dusts (e.g., acids, alkalis), ensure the filter media is chemically resistant (e.g., PTFE) and consider pre-treating inlet air with neutralizing agents.
Maintain airflow balance: Uneven airflow across the filter bank can cause some filters to clog faster than others. Periodically check airflow distribution using anemometers or pitot tubes, and adjust dampers or fan speed to ensure uniform flow. For large systems, consider installing flow meters at each filter bank to identify and address imbalances.
Prevent contamination: Keep the dust collector and ductwork clean to avoid introducing foreign materials that can damage filters. Regularly inspect fan impellers and inlet ducts for debris buildup, which can unbalance the fan and increase vibration, leading to filter damage. For systems handling sticky or hygroscopic dusts (e.g., sugar, cement), schedule periodic cleaning of the collector housing to prevent dust from adhering to walls and falling onto filters.
Train operators: Ensure operators understand how to monitor filter performance and recognize early signs of issues, such as rising pressure drop or unusual noises. Encourage operators to report anomalies promptly—delayed action can shorten filter life. Provide training on adjusting cleaning cycles or fan speed based on production changes, as overloading the system with excessive dust can clog filters quickly.
In conclusion, dust collector filter replacement is a critical maintenance task that requires careful preparation, safety adherence, and attention to detail. By following the steps outlined in this guide—from pre-replacement planning to post-installation testing—facilities can ensure that filters are replaced safely and correctly, restoring system efficiency and protecting workers and the environment. Additionally, implementing post-replacement care practices extends filter life, reduces costs, and minimizes downtime. In industrial settings where dust control is essential, proper filter replacement is not just a maintenance chore but a key investment in operational success.
sign up newsletter
Email:cennia@szmizhi.com
Add::104,Building 27,Third Industrial Zone, Longxi Community,Longgang District,Shenzhen,China.